eats, life

Van Life: Reaction Video

Yesterday we posted about our friends, Courtney and Bryce, who are traveling the United States in their van. They recently posted a video of the meals they eat during a typical day on the road. To celebrate (and lovingly mock) them, we thought it would be fun to replicate their meals in our full-sized kitchen and document our reactions in this 9-minute video. Enjoy! (Because you probably won’t get many more of these.)

We made oatmeal, chickpea salad sandwiches, and peanut butter stir fry! You can find more details about those recipes here, as well as see the full video from Courtney and Bryce, which gives you a better idea of how to make them.

What we learned from making their meals:

  • There are delicious plant-based recipes out there you can make and love to eat. (This may sound blasphemous, but not everything has to be made on the Big Green Egg.)
  • It’s hard to make yourself vulnerable to an audience on camera.
  • Documenting your life on camera is consuming, so it’s important to take moments to just enjoy what you’ve created.
  • We don’t live a cool, van life, so we have the time to make reaction videos to our friends’ lives, apparently.
  • Our friends are adorable and funny, and we love them for putting up with us (and this video).
  • Oatmeal doesn’t fill you up. But peaches on your oatmeal are by far the best fruit to put on your oatmeal. (Tehehehe.)
  • You can make the chickpea salad sandwich your own by swapping out ingredients, as Courtney mentions in their video. Melissa suggests swapping tomatoes for grapes!
  • Make the peanut butter stir fry with just a half bag of rice noodles for more saucy and veggie goodness! Also, dabbing Sriracha or sprinkling some cracked red pepper could add a little spicy kick.
  • Two people can eat on $22/day and have leftovers to spare.
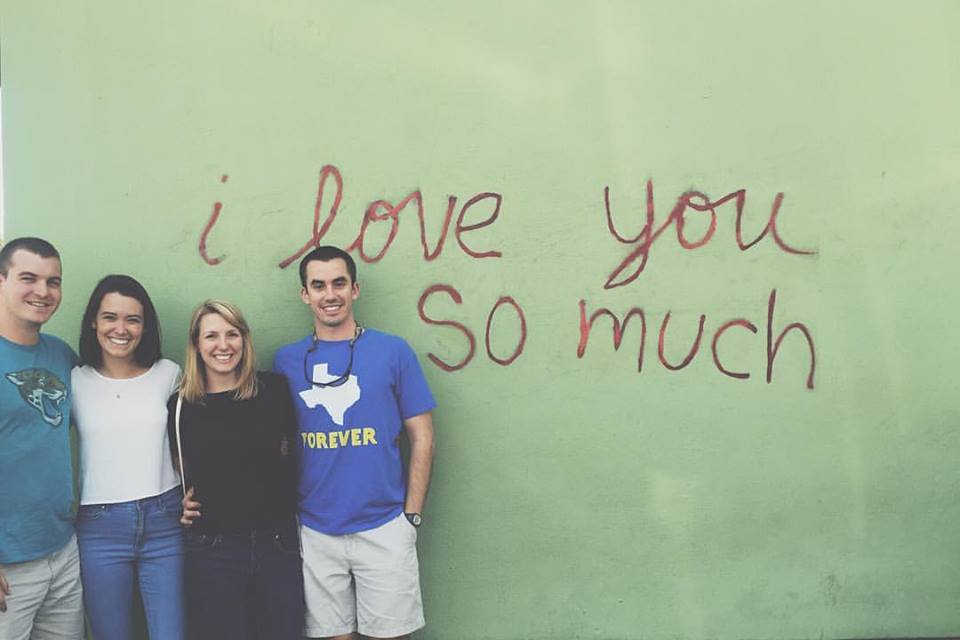
  • We are incredibly proud of our friends, Courtney and Bryce, deeply respect what they have been able to accomplish in the last five months on the road, and look forward to seeing what else is in store for them!

$22/day for 6 meals = $3.68/meal

We went to KROGER to buy all the ingredients to make these meals, and it cost us a whopping $22, and we even had leftovers! We think that’s amazing. Courtney and Bryce get a lot of questions about how they afford to take a trip like this. It’s because they make sacrifices all the time by 1) making everything themselves even when it means the inconveniences of doing dishes at a campsite, and 2) not spending money on going out to eat along their trip. We’re not sure that’s something we could do!

The last thing we want to point out is that their meals are healthy. Yes, they have a lot more carbs than we’re used to, but because they are healthier grains, we burned through them fast – especially on a VERY hot Houston day. Typically, people make excuses for not eating healthy. “It’s too expensive or too hard to cook.” But their videos  prove healthy meals can be affordable and easy (especially if you’re not living in a van).


Dear Courtney and Bryce,

Thanks for being such an inspiration! We are literally telling everyone we know to SUBSCRIBE to your page. We love you!

12742446_10153659953586263_727505759543845714_n

extras

How To Tuesday: Build A Raised Planter Box

Recently we have been dabbling in growing small herbs on our kitchen windowsill, and then Joey caught the bug when he planted a pineapple and it started to take off! We had talked about starting a real garden in the backyard but didn’t know exactly what we wanted, because Regal also loves to play in the yard. Joey decided he was going to build a raised planter box, so we could move it around the yard if need be and keep the plants out of harms way (aka Regal and his racquetball). To make the planter, box it only took about 5 hours on a Sunday morning/afternoon and cost about $100 in supplies. If you decide to give this a try, don’t hesitate to ask us questions and be sure to tag us on Facebook or Instagram so we can see how it turned out!

**These supplies and measurements are based off the 4ft x 2ft x 11in box we made and it stands about waist high (30 inches).**

Supplies:

  • Tape Measure
  • Pencil
  • Circular Saw
  • Drill
  • Saw Horse
  • Nails ( 1-5/8in. )
  • Screws (1-1/4in. )
  • Wood Glue
  • Cedar Boards 1x4x8 (3 total)
  • Cedar Boards 1x6x8 (5 total)
  • Cedar Board 1x2x8 (1 total)

*We used cedar wood because it is strong, does not contain chemical like pressure treated and does not rot easily.*

Steps & Directions:

  1. Pick up the supplies from your local home improvement store.
  2. Measure and cut the 1x4x8 into eight 30 inch pieces for the legs and one piece 24 inches in length
  3. Assemble the four legs by overlapping two pieces of wood making a right angle (see pictures below for set up).  Apply wood glue along the edge of one piece and clamp them together, one on the top and one on the bottom to help the glue set.
  4. While the two pieces are clamped together, nail the center section together with two nails equal distance from the top and bottom clamps. After you remove the clamps hammer in a nail where the clamps were.
  5. Repeat steps 3&4 until all four legs are assembled.
  6. Measure and cut the 1x6x8 boards into four 4ft long pieces.  These will be used for the long side of the box.
  7. Measure and cut the 1x6x8 boards into four 2ft long pieces. These will be used for the width sides of the box.
  8. If you made the first cuts correctly, you should have leftover 1×4. Take what you have and cut them into four 4in. to 5in. pieces.  You will use these to attach the Length & Width pieces when they are stacked together on the soil facing side of the wood. (See picture below.)

  9. Once you have all the sides stacked and attached you are ready to glue and screw them to the legs.
  10. Take one side at a time and line it up with the inside of a leg.  Apply some wood glue to the leg where you will screw the side to the leg. Apply four screws the the soil facing side of the 1×6 into the leg.  When drilling in the screws be sure to go slow so you don’t split the boards or drill to far and go all the way through the leg. 
  11. Repeat step #10 until all 4 sides are secured to the legs.
  12. Your planter box should be taking shape! Now its time to get the bed ready.
  13. Take the 1x2x8 and cut it in half.   You will use these two pieces as the shelf to lay the bed boards on.
  14. Cut the 1x6x8 into eight 24in. pieces.  These will be used for the bed along with the 24in 1×4 from step #2.
  15. Flip the now assembled box upside down so the legs are in the air. You are now going to glue and nail the “shelf” for the bed boards on to the bottom side of the 4ft boards.  Apply glue to the 4ft side of the box and then nail the “shelf” on.  I used about six nails on each “shelf” to give it strength because all the weight of the soil will rest on this. Repeat for the other side.
  16. Return the planter box to the correct standing position and begin to lay the bed boards in.  You might find the 24 in. 1×4 might be a little two wide, if this is the case trim it to fit. (We had to take off about an inch) We liked the way the pieces fit together and decided to not glue or nail them in.
  17. Now you are pretty much done!
  18. We took it one step further and decided to use our JJ George Torch to lightly burn the planter and give it a weathered look.  We chose to do this instead of staining it because it was cheaper and didn’t want to risk chemicals getting into the soil (If that is even possible…).
eats

BGE Italian Sausage Pizza

One of our favorite things to make on the Big Green Egg is pizza – or as we like to pronounce it “preet-zah” when we’re being playful. This is probably our third time making pizza on the BGE, and this may be the best one we have made so far.

Let’s start with the dough…


Joey’s Dough Recipe

This was my first time making dough from scratch, and let me tell you, it is worth the effort.

Ingredients (makes two crusts):

  • 4 ¼ cups flour
  • 2 ¼ teaspoons instant yeast (one packet)
  • 1 ½ teaspoons salt
  • 2 teaspoons sugar
  • 2 tablespoons olive oil
  • 1 ¾ cups warm water

Directions:

  1. Mix all the dry ingredients together and run through a sifter to ensure there aren’t any lumps.
  2.  Turn your mixer on low and slowly add in the olive oil and then the warm water.  Turn the mixer off once the dough becomes sticky to the touch and all dry ingredients have been mixed-in.
  3. Let the dough rest for 2ish minutes while you coat two medium to large bowl with a light coat of olive oil.  This step is key so you don’t have a sticky mess later and adds a little extra flavor!
  4. Split the dough between the two bowls, cover with saran wrap and place in the fridge to rise until you’re ready to cook. *You can let it rise overnight but  might want to use larger bowls than the ones we used.*


Next, let’s talk toppings…


We Called It A “Pesto Italian Sausage Pizza”

On our preet-za, we put:
  • Classico pesto sauce to your liking
  • 1/2 tomato, sliced
  • 6 oz mozzarella cheese, sliced
  • 1/8 medium red onion, sliced
  • Garlic clove, minced
  • Grilled Italian sausage, sliced

Our pesto sauce came from a jar this time, because it was a busy week. (But we’re impressed with the pesto sauce Classico makes!) In hindsight, we only wished we would have drained the sauce a little bit, because it ended up being a little more oily on the pizza than we would have preferred. Either way, doesn’t Joey look great holding that ZA?


Cooking the “Preet-Za”:
  1. After you cook the sausage, set your BGE to 450 degrees indirect while you cut and prepare the toppings. We arrange the plate setter with the legs up and place the grilling grate on the legs to cook on.
  2.  Remove one of your dough crusts from the fridge and dust your rolling surface with flour. We found that it is much easier to roll the dough while it is still cold and if you dust the rolling pin with flour too.
  3. Once you have the dough to the size you want, sprinkle your pizza stone with corn meal and place the dough onto the stone. (Some people use parchment paper instead of corn meal but we prefer the extra texture the corn meal adds.)
  4. Lightly brush your dough with olive oil and add your toppings.
  5. When the BGE is up to temp, place your stone on the grate and close the dome.
  6. Melt some butter, and 15 minutes after putting the preet-za on, brush the crust with the melted butter and let the preet-za cook for about 15-20 more minutes.
  7. It’s up to you how done you want your crust, but we typically let the pizza cook 30-40 minutes.
  8. Cut it up and enjoy! Cheers!!

Here’s what the final product looked like:

img_0335

We will definitely make this one again!

dogs, life

TPLO Surgery Update

It’s been two weeks since we last posted. So much has happened. We’re excited to get back to our regular posting schedule, but wanted to give you an update on our sweet pup first.


Side note: Thank you to all who contributed to our GoFundMe page. You raised $480 in three days, which helped put us in a better position to pull the trigger on Regal’s TPLO surgery. We can never repay you for your generosity, but we hope you enjoyed the cute Polaroids Regal shot for you. Thank you so much!

Monday, July 30, 2018: Consult With Sugar Land Veterinary Specialists

If were weren’t down on our luck enough, we had some trouble with our first orthopedic consult where we first discovered Regal’s ACL was torn. The first place (Gulf Cost Veterinary Specialists) wanted to charge us more than what a typical TPLO costs ($2,000 more), because they only do a fancy, unnecessary procedure in conjunction with the TPLO surgery. They didn’t tell us that there were other, just-as-effective, and less expensive options, which is what ultimately made us the most upset.

But after talking with Sugar Land Veterinary Specialists on the phone, we knew this would be the right fit for us. Joey took Regal to his consult appointment. On just three legs, Regal limped in, acting as a ham, per the usual. He received lots of pets and was a champ! He handled the poking and prodding and didn’t become upset until he was back in his room after the exam. The orthopedic surgeon team there confirmed he did tear his ACL, and Regal needed the TPLO surgery. Luckily, they had an appointment open for the next day.

img_3651
Regal at his consult appointment at Sugar Land Veterinary Specialists

Monday night was rough, because you continually have these thoughts that it might be the end of the road for you and your best friend. Also, instead of being able to just lay around and snuggle, we had to give Regal an anti-septic bath. Regal hates baths, and to make matters worse, you have to leave this special soap on for 10 minutes before rinsing. The poor guy couldn’t even rush to his favorite part of bath time, which is toweling off. He was mad at us the rest of the night, which made Melissa even more emotional.


Tuesday, July 31, 2018: Regal’s Surgery

We woke up bright and early to try and ensure Regal was the first surgery of the day. There are no guarantees, but we dropped him off as early as we could at 7:00 a.m. When dropping him off, the surgical team sat down with us and walked us through what to expect. We handed over some food and treats, and then, handed over Regal. That’s when the pit in Melissa’s stomach started.

Around 10:30 a.m., the surgical team said Regal was prepped and ready for surgery. They were waiting for the anesthesia to kick in to take him for updated radio-graphs and  surgery. This is when Melissa’s stomach pit grew larger, and she could feel it in the back of her throat until she received the next call…

At about 2:00 p.m., the wonderful Dr. Bubenik called to say Regal was out of surgery. The surgery had gone great, but they did find that Regal had also torn his meniscus. They were forced to remove part of that tissue too. But she expected Regal would still make a full recovery. Melissa’s pit returned to stomach only.

At 4:00 p.m., the surgical team called to tell us Regal was awake. They were letting him slowly wake up and rest, but they were going to try to get him to eat and go on a walk soon. They said at around 8:00 p.m. they would send us a picture update.

These are the pictures Sugar Land Veterinary Specialists sent us that night (aka Regal on drugs):

Wednesday, August 1, 2018: Reunited With Regal

Although knowing Regal was doing OK, it was still hard to sleep well Tuesday night. When we woke up on Wednesday morning, the surgical team called to setup a pickup time. We landed on 4:00 p.m. When we arrived, we spent about 45 minutes talking with Linda (She is so great!) about post-operation procedures for Regal.

We learned our new, daily routine for the next 6+ weeks will look like this:

  • Warm compress for 10 minutes.
  • Walk on leash for 10 minutes.
  • Physical therapy exercise one: Knee Flexion and Extension
  • Physical therapy exercise two: Weight Shifting (Side-To-Side)
  • Cold compress for 10 minutes.
  • Administer 4-6 pills.
  • Feed boiled chicken to ensure there’s food in the belly.
  • Repeat 1-2 more times per day.

I’m not sure we knew what we were getting ourselves into. After being a little overwhelmed by PT exercises, we were finally reunited with Bubba:

It made our new daily routine seem worth it. That’s when the pit in Melissa’s stomach finally went away.


Post-Operation Regal

Since Regal’s surgery on August 1st, he has been doing great, but only because of some very special people:

  • The team at Sugar Land Veterinary Specialists: Thank you for walking us through everything to expect. You recognize our pets are our children, and our concern runs deep. The detail you put into your work eased us during an incredibly “ruff” time, and we couldn’t be more thankful for the step-by-step instructions and videos.
  • Meredith and Colton Beall: Thank you for taking over post-operative duties while we traveled to see our family on a nonrefundable trip. We could never repay you for showing up for us and our little champ. (Sorry he hated taking his pills.)
  • Our friends and family: Thank you for continually checking in. We appreciate getting to tell you how Regal is, because it reminds us that he is going to be just fine.
  • Supporters: An additional thanks to those who helped make this surgery possible. Without you, we would be a lot more stressed.
  • Olivia Craig: For sending us cupcakes and pupcakes from Sprinkles. You made us feel a little bit sweeter about the situation we were in.

Regal still has a long road to recovery, with a follow-up Monday, and another check-up in four weeks – but from what we can see, he is going to make a full recovery, and be able to live a normal, active, playful life again soon. Now, if only we could get him to take his pills more easily. <Insert frustrated because our dog is stubborn faces here.>

Our post-surgery pup, Regal, and delicious cupcakes and pupcakes thanks to our sweet friend, Olivia.


extras, life

No Landscaping Professionals Needed Here!

Hello, readers! My name is Ashley Kempa – you may know me as Melissa’s fast-talking bestie from the north. My husband Zack and I are also living the DINK life and we’re so excited about Melissa and Joey’s new blog! For Zack and I, the biggest focus of our DINK lifestyle right now is planting roots – both literally (I LOVE my gardens) and figuratively.

Zack and I have been married for just over two years now, and the first year of marriage was focused on finding a home to begin our lives as “The Kempa Family.” While I was born and raised in the Philadelphia area, the area near our jobs is about an hour from my hometown so all new territory. We spent several months trying to find a house that was affordable, checked the boxes on our non-negotiables, and would help us to transition from DINK to BARK (Broke Adults Raising Kids – yes, broke…a topic for another day…*cough Daycare cough*).

Here’s what were in our non-negotiables (which have to be realistic based on your budget):

  1. Cannot be a total “gut-job”
  2. 3 Bedrooms with at least 1.5 baths
  3. GREAT school district
  4. Nice community
  5. Close to our jobs

So, here’s what we bought to plant those roots last July:

  1. A house that was owned by the prior owners for a very long time so it just needed some “New, Fresh Love”
  2. 3 Bedrooms w/ 1.5 baths
  3. GREAT school district
  4. AMAZING community
  5. Close to our jobs

My posts on this blog will focus on items number one and number four from the above list – how to add some new, fresh love into your house, and how to be a DINK in a family-friendly community!

But for this post, I’m going to focus on a recent project we did to our house…

DIY Landscaping

Zack and I are DIYers – aka we’re cheap, want to learn new skills, and love watching a vision come to life. The front of our house when we bought it had death-trap stairs leading up to our front sun room. If you were not paying attention or walking too fast, you could absolutely be on your way to an urgent care – hello, twisted ankle. Not good. Instead of paying over $1,000 for a landscaper to come out and re-pave our front steps, I knew we could do this for not a lot of money and learn as we go. Here’s what we started with:

Before

Before

Cute, right?

The first thing we did was tear out all of the bricks and railroad ties. This step only took about 45 minutes and the hardest/longest part was stacking all of the bricks. Even if you were going to hire a landscaper to do this for you, you’d be able to save some money just by tearing out the old yourself before someone comes in to lay the new.

Tearout

Next up, mapping out what we were going to replace these with. We chose to purchase large paver stones for two reasons – they were relatively inexpensive and the larger stones are easier to work with. My parents helped us draw out the dimensions of the steps and calculate how many stones and blocks we would need for the entire project. Having this prepared ahead of time saved us time in the store and money! We learned by slightly changing the sizing of the steps we could save by not needing as many stones and blocks.

Third step – HOME DEPOT.  First trip to home depot included checking the store’s inventory to make sure they would have enough of what we needed – very important! They did, so we began 1 of 3 or 4 trips to Home Depot to get everything we needed….and a few additional purchases like some herbs that got planted in my garden.  My parent’s dog, Mia, helped pick those out.  Isn’t she adorable?

Mia

After several trips, we had the blocks, mapped out our design, and we were ready to go!

Blocks

So, how did we do this?  Let me sum it all up by saying trial and error.  I followed these steps and repeated multiple times until I achieved success:

  1. Dig spot for blocks (thank you, Mom, for your help!)
  2. Lay blocks down
  3. Level in all directions
  4. If not level, lift block up and adjust by adding or removing sand/dirt.

Note: if you are starting from scratch and not working in an area where steps were already existing, you will need sand to level and hold the blocks in place.  Fortunately we did not need to purchase as there was plenty there from the bricks!


After about 6 hours of work, we had two steps completed:

Progress

The remaining last step and flat surface of steps were all completed by Zack – Rockstar! We waited for a few good rains to occur to help the stones settle. We’re now in the maintenance phase where we just adjust a few stones here and there. Aren’t the new steps beautiful?!

We spent $200 total on this project, took 10 or so hours total, and we used the great help of my Mom and Dad (thank you!). We learned how to map out an idea, budget for a project you want to tackle and got several good workouts in while accomplishing the finished project. We’re now already eyeing the entrance into our backyard through our fence gate. New stepping stones would look pretty nice over there…

Until next time, readers!  Be inspired to DIY and give your home some LOVE!

thumbnail_Image-1