eats

Thunderbird Thursday: Labor Day Ribs

Hey friends, Joey here. If you’re looking for something easy to cook up over the long weekend, look no further! Here is the way I like to make ribs and of course I ALWAYS cook them on the Big Green Egg. Before I break it down, the ribs featured on this post are seasoned with Thunderbird Chicken Scratch and dusted with Lane’s Sweet Heat rubs. I know Chicken Scratch might seem strange to season ribs with but it was a great rub for sweet ribs with a zing and kick with the compliments Lane’s Sweet Heat. I am working this combo into my rib rotation ASAP.

Preparation:

  1. Pull the film layer off the non-meaty side of the ribs.
  2. Trim the hard and thick fat off the meaty side of the ribs.
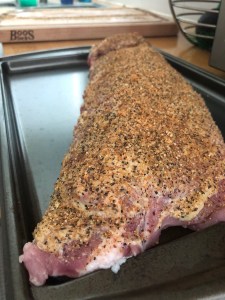
  3. Season the meaty side with your rub(s) of choice and when you think you have enough, add a little more!
  4. Let the ribs rest in the fridge until you are ready to cook. **Be sure to cover them if you are planning on leaving them for more than a few hours.**

img_0397

Cooking:

  1. Set your BGE to 250° indirect.
  2. Before you add the plate-setter be sure to add your pecan and apple wood. (Pecan and apple wood are my favorites for ribs.)
  3. After the smoke has lost its bluish tint, place the ribs on the center of the grill and close the dome lid.
  4. Rotate the ribs ¼ turn about every 45 minutes
  5. After about 2.5 hours, lay out two sheets of aluminum foil on top of each other, and place four pads of butter on the foil, drizzle some honey over them, add some rub, and pour a few splashes of beer over everything.
  6. At 3 hours, pull the ribs from the BGE and place them meat side down onto the butter bed and wrap them up.  This might take another piece of foil to fully cover the top.
  7. After the ribs are wrapped, place them on the grill for another hour, meat side down.
  8. Pull the ribs from the grill after an hour and let them rest in a cooler or the counter top for at least an hour before serving.
  9. When you are ready to serve unwrap the rib carefully not to spill an juices so that you can us them to sauce the ribs after plating.
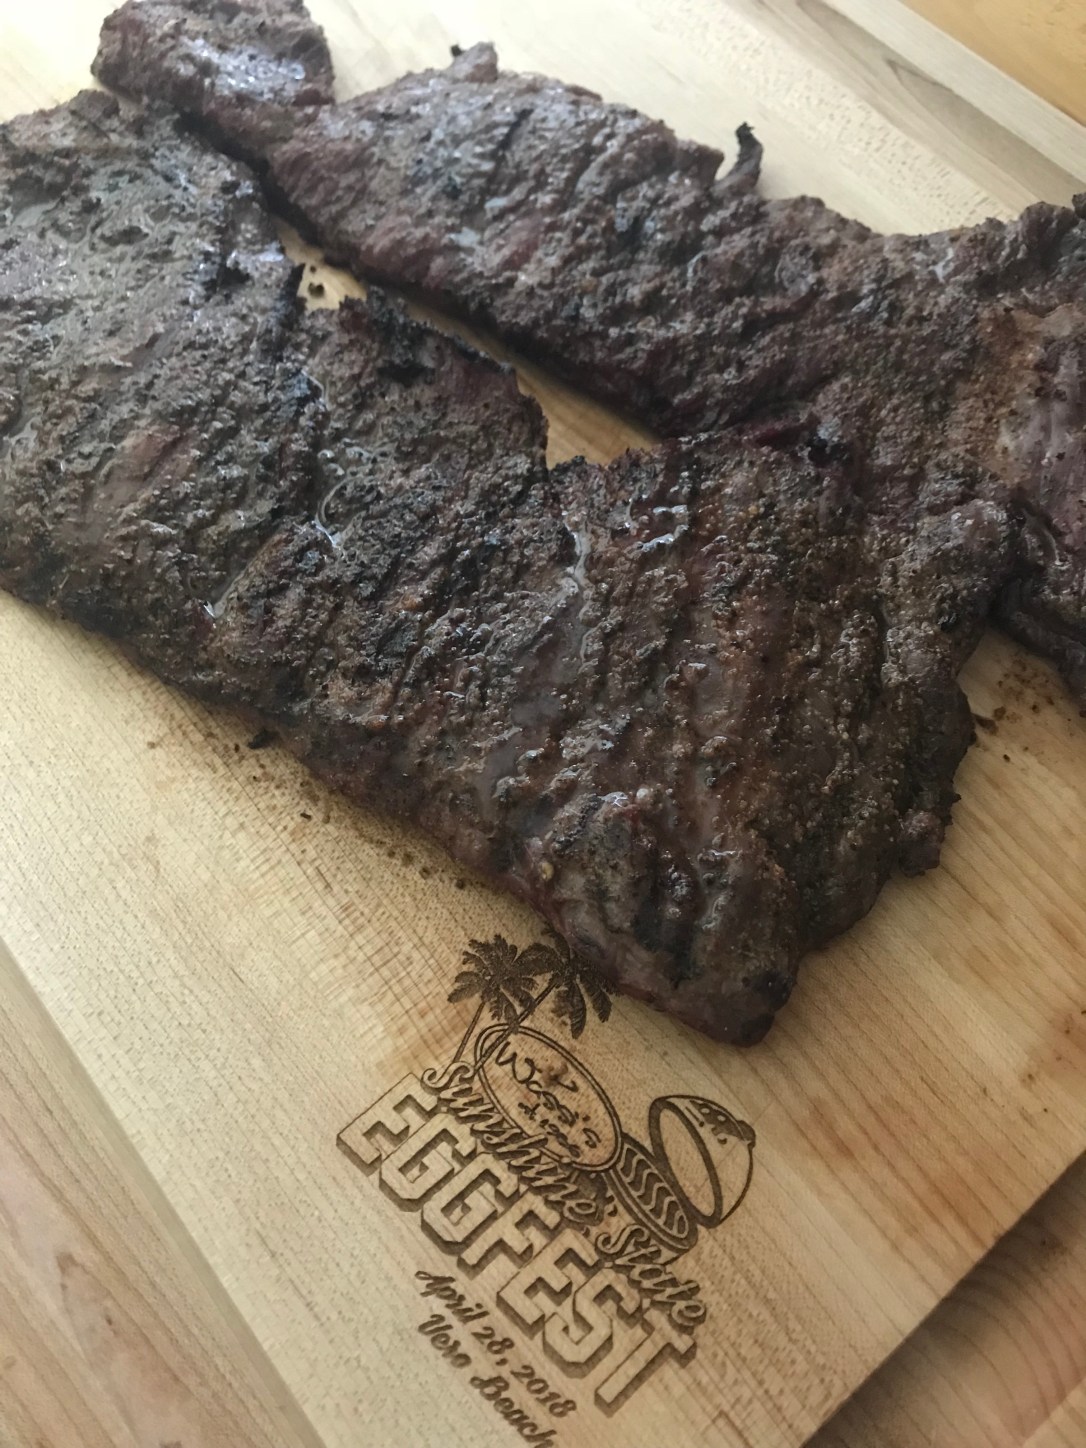
  10. A trick to cutting the ribs evenly is the flip them on the meaty side and follow the bones.
  11. Cut the ribs and ENJOY!

img_0405


eats

Dijon Salmon and Cashew Slaw

We were feeling like a summertime fish dish, so we came up with these Dijon salmon and cashew coleslaw recipes.


Inspiration Sparkers

But first, we’ll give credit where credit is due. Our recipes are based off of two sources, which we tweaked to fit our preferences. But if you want recipes with more directions and artsy photos, then you may want to check out the original recipes:

Thanks for helping to spark our foodie inspiration!


Dijon Salmon

Ingredients

  • 1 1/2 lbs salmon
  • 1/4 cup fresh parsley, finely chopped
  • 1/4 cup Dijon mustard
  • 1 tbsp lemon juice
  • 1 tbsp avocado oil
  • 3 garlic cloves, finely chopped
  • salt and pepper

Directions

  1. Place salmon on cedar plank.
  2. Mix remaining ingredients in small bowl and generously top salmon.
  3. Set the Big Green Egg (BGE) to 400 degrees direct.
  4. Once the BGE is up to temperature, place the cedar plank with the salmon on the grill grate and close the dome and let the fish cook for 12-15 minutes.
  5. Check the internal temperature of the fish and once it hits 140-145 degrees you are ready to pull it off the grill.
  6. Be careful when removing the cedar plank because it will be hot and possibly still have burning embers on the bottom.
  7. Enjoy!

Cashew Slaw

Ingredients

  • 14 oz coleslaw package (Make sure it’s not already dressed.)
  • 1 tablespoon olive oil
  • 1/2 tablespoon red wine vinegar
  • 1/4 cup mayonnaise (We actually used Veganaise!)
  • 1/2 cup roasted cashews (You can crush some of the cashews if you would like.)
  • 1/4 cup parsley, chopped
  • Salt and pepper, to taste

Directions

  1. Mix everything in a bowl, season to taste, and enjoy!

img_3565

eats

BGE Italian Sausage Pizza

One of our favorite things to make on the Big Green Egg is pizza – or as we like to pronounce it “preet-zah” when we’re being playful. This is probably our third time making pizza on the BGE, and this may be the best one we have made so far.

Let’s start with the dough…


Joey’s Dough Recipe

This was my first time making dough from scratch, and let me tell you, it is worth the effort.

Ingredients (makes two crusts):

  • 4 ¼ cups flour
  • 2 ¼ teaspoons instant yeast (one packet)
  • 1 ½ teaspoons salt
  • 2 teaspoons sugar
  • 2 tablespoons olive oil
  • 1 ¾ cups warm water

Directions:

  1. Mix all the dry ingredients together and run through a sifter to ensure there aren’t any lumps.
  2.  Turn your mixer on low and slowly add in the olive oil and then the warm water.  Turn the mixer off once the dough becomes sticky to the touch and all dry ingredients have been mixed-in.
  3. Let the dough rest for 2ish minutes while you coat two medium to large bowl with a light coat of olive oil.  This step is key so you don’t have a sticky mess later and adds a little extra flavor!
  4. Split the dough between the two bowls, cover with saran wrap and place in the fridge to rise until you’re ready to cook. *You can let it rise overnight but  might want to use larger bowls than the ones we used.*


Next, let’s talk toppings…


We Called It A “Pesto Italian Sausage Pizza”

On our preet-za, we put:
  • Classico pesto sauce to your liking
  • 1/2 tomato, sliced
  • 6 oz mozzarella cheese, sliced
  • 1/8 medium red onion, sliced
  • Garlic clove, minced
  • Grilled Italian sausage, sliced

Our pesto sauce came from a jar this time, because it was a busy week. (But we’re impressed with the pesto sauce Classico makes!) In hindsight, we only wished we would have drained the sauce a little bit, because it ended up being a little more oily on the pizza than we would have preferred. Either way, doesn’t Joey look great holding that ZA?


Cooking the “Preet-Za”:
  1. After you cook the sausage, set your BGE to 450 degrees indirect while you cut and prepare the toppings. We arrange the plate setter with the legs up and place the grilling grate on the legs to cook on.
  2.  Remove one of your dough crusts from the fridge and dust your rolling surface with flour. We found that it is much easier to roll the dough while it is still cold and if you dust the rolling pin with flour too.
  3. Once you have the dough to the size you want, sprinkle your pizza stone with corn meal and place the dough onto the stone. (Some people use parchment paper instead of corn meal but we prefer the extra texture the corn meal adds.)
  4. Lightly brush your dough with olive oil and add your toppings.
  5. When the BGE is up to temp, place your stone on the grate and close the dome.
  6. Melt some butter, and 15 minutes after putting the preet-za on, brush the crust with the melted butter and let the preet-za cook for about 15-20 more minutes.
  7. It’s up to you how done you want your crust, but we typically let the pizza cook 30-40 minutes.
  8. Cut it up and enjoy! Cheers!!

Here’s what the final product looked like:

img_0335

We will definitely make this one again!

eats, extras

“Reverse, Reverse”….. Reverse Seared Steaks!

Our First Extra

img_0230
Joey, John, and Nick at Sunshine State Eggfest before they won People’s Choice

John Churey…. or Bar B “Chu” as we like to call him, is one of Joe and Melissa’s great friends from Joe’s time at Florida State University. Also an Insurance Wholesaler by trade, Chu is an “Egghead” (Big Green Egg Enthusiast) through and through! After all, he has enough of em to make an omelet…four to be Eggsact!! Not to mention he is head chef of “Risk It…. FOR THE BRISKET” BBQ Team that won the 2018 Sunshine State Eggfest Peoples Choice award, but that’s a post for another time.  In between weddings and insurance Chu loves hanging out at Wassis Meats in Melbourne, FL cooking, and talking all things Big Green Egg every Saturday with the Wassis Posse (Riverway Mike, Capt. Phil, Johnny Bacon, and the Crew). Come on by if you’re ever around the Space Coast!

We’re Eggcited to have Chu as the first “Extra Treats” guest blogger! Follow along his cooks on Instagram @bar_b_chu !

Let’s Start This Thing In Reverse

Love steak, but intimidated by all those Instagram pictures you’ve been seeing? Or looking to switch up your normal hot and fast grilling methods on steaks and chops? Introducing the Reverse Sear! Much like the name implies, the reverse sear is simply a traditional sear….in reverse. Traditional searing starts with searing initially, to create a beautiful crust before baking at a lower temperature until the desired internal temperature is achieved. The Reverse Sear is simply, the reverse! Start by baking steaks or chops at a low temperature (200-250 degrees) until their internal temperature is 5-10 degrees shy of your desired finished internal temperature. Once the steaks are close to desired finished temperature, take a hot skillet or grate and sear for that crunchy, flavorful crust  you would expect to find at the country’s finest steakhouses! Steakhouse quality, without the steakhouse price!

If that didn’t sound like enough of a culinary roller coaster for your taste buds, we stepped this up another notch and added bacon…grease to the equation. Render down some thick cut bacon ahead of time, set the grease aside, and enjoy a little bacon appetizer along the way!


Directions for Reverse Sear:

  1. Rub your steak with a generous amount of seasoning. For Beef I recommend Wassis Classic Steak, or Four41 Fat Henry’s.
  2. Fire up your Big Green Egg, letting the coals burn until smoke stops. Usually 15-20 minutes. Then set Egg for Indirect cooking (with ConvEGGtor, aka plate setter) and adjust vents accordingly to achieve 200-250 degree dome temperature. Return grate to Big Green Egg.
  3. Once the Egg is up to temp, place steaks on grate and let bake until internal temperature reads approximately 5-10 degrees shy of desired finished temperature. A Thermoworks Termapen is a great addition to any pitmasters tool box!
  4. Once steaks are 5-10 degrees shy of finished temp, set aside and cover loosely.
  5. Remove Grate and ConvEGGtor with a good pair of heat resistant gloves, (Blue Fires are my personal favorite), place grate and a Lodge Cast Iron Skillet back on egg, open bottom vent all the way and let the egg heat up for 5-10 minutes until skillet is very hot, leaving the dome open.  
  6. Place butter or bacon grease in skillet and let it heat up.  
  7. Carefully place Steaks in the hot grease or butter for 30-45 seconds per side, keeping a close eye not to burn.
  8. Remove Steaks from Lodge Cast Iron Skillet, and Enjoy Immediately! No Need to rest the meat when using the reverse sear method.
  9. Meat Sweats Commence!

Works on Pork Chops, too!

Feel free to try Reverse Searing on your favorite Pork Chops as well, you’ll love the results! You can achieve similar results with a gas grill/Sous Vide / stove top or any combination of culinary gadgets you have at your disposal, although I am partial to the results produced by the Natural Lump Charcoal, and the heat & moisture retaining properties of the Big Green Egg!

Follow along @Bar_B_Chu on Instagram!

eats

Simple Spatchcock Chicken w/ Salt & Vinegar Potatoes

Earlier this week we planned a simple, yet delicious, meal consisting of a full chicken which we can stretch into lunches the next day (surprise, surprise). For those of you who are unfamiliar with what a “spatchcock chicken” is, it is a whole chicken which has had the backbone removed so it can lay flat while cooking or roasting. When preparing the chicken we like to use a sharp pair of kitchen scissors  and simply cut up both sides of the backbone until it is removed. By doing this you allow the chicken to cook quicker on the grill, opposed to a beer can or rotisserie style.


Ingredients:


Directions

  1. Remove the backbone from the chicken, rinse thoroughly, and pat dry leaving the skin on.
  2. Season chicken with Meat Church’s “The Gospel” All Purpose Rub until thoroughly coated and dust with Wassi’s Maple Reserve rub for a touch of sweetness.
  3. Set the Big Green Egg to 400 degrees direct and place the chicken breast side down for 15 minutes or until the skin becomes crispy.
  4. After the 15 minutes, flip the chicken to the back side with the legs/thighs fanned out and let roast for 30-40 minutes until the breasts reach 155 degrees.
  5. While the chicken is on the egg, wash the red potatoes and place into a pot of water and set the stove to high and boil for 25-30 minutes until they are soft.
  6. Strain the potatoes and water and let them cool briefly.  Once the potatoes are cool enough to handle, use a heavy glass/mug to press them into small circles.
  7. Heat butter in a pan on medium-high heat until  melted and then place the pressed potatoes in the pan and rotate them until crispy on both sides.  Salt and pepper to taste.
  8. Once the potatoes are crispy add the white vinegar and turn off the heat letting the vinegar soak into the potatoes.
  9. Remove the chicken after reaching 155 degrees and let rest for 5-10 minutes.
  10. Serve with a side of Trader Joe’s Sriracha & Roasted Garlic BBQ Sauce and ENJOY!

This is a great recipe for hosting and/or meal prepping! You should get around 4-5 servings, dependent on how many scraps you end up feeding your dog. If you try it, let us know what you think!

eats

A Twist On Carne Asada

Inspiration Sparkers

Our twist on this Carne Asada recipe was inspired by this Primally Inspired Carne Asada recipe and this Mexican Food Journal Grilled Tomato Salsa recipe. Thank you for fueling us and our foodie fashion.


This Week’s Eats

We typically try to plan out our meals each week, and we spend the weekend grabbing the supplies we need. On Sundays, we prep as much as we can for the coming week (i.e. chopping vegetables, marinating meats, etc.). That way, it’s easy for one of us to take over dinner each night. We both take turns cooking, depending on our schedules. Joey does all of the grilling, and Melissa does most of the oven and stove-top meals.

Last Sunday, we prepped this incredible salsa recipe, because two of our weekly recipes called for salsa, including our Carne Asada recipe. Plus, we had been dying to make salsa on our Big Green Egg!


IMG_0179

Grilled Tomato Salsa (Paleo, Whole30)

This recipe makes about two cups of salsa. Here is our take on Grilled Tomato Salsa:

Ingredients

*Side note: I know our picture has two jalapenos, but we’re babies, and could only handle the heat of one blended in.*

Directions

  1. Peel and cut the onion in half, and season cut sides with Volcano Spice Gourmet Seasonings’ Hawaiian Style Chili Salt.
  2. Place all vegetables on Big Green Egg at 300 degrees indirect. (We smoked everything over apple wood chunks.)
  3. Watch vegetables until skins begin to char. This should take pproximately 45 minutes to an hour.
  4. Remove from grill and let vegetables cool down.
  5. Remove garlic cloves from bulb, some seeds from jalapeño, and skin vegetables the best you can.
  6. Place everything in the blender and mix for 15 seconds. (We wanted to make sure we had a chunkier salsa.)
  7. Add salt, pepper, lime juice, and cilantro to your liking.
  8. Serve warm or cold – and enjoy!


IMG_3308

Avocado Grilled Tomato Salsa (Paleo, Whole30)

The Carne Asada recipe called for a Tomatillo Avocado Salsa, but since we knew we were already prepping salsa, we just bought avocados to incorporate our twist on the recipe.

For our twist, take 3/4 cups of the finished Grilled Tomato Salsa and blend 1 1/2 small avocados. Garnish with extra cilantro on hand. Even after finishing our Carne Asada, we had to grab chips to enjoy more of this salsa! It’s delicious, nutritious, and very refreshing!


IMG_3309

Carne Asada (Paleo)

This recipe makes 3-4 servings. Here is our take on Carne Asada:

Ingredients

Directions

  1. Season flank steak with Wassi’s Classic Steak Rub, and dust with Lane’s BBQ Kapalua Rub about an hour before firing up the grill.
  2. Place seasoned steak on Big Green Egg at 400 degrees direct for 2.5 minutes per side.
  3. Remove from grill and let rest for 5-10 minutes.
  4. Cut the steak into 1/2 inch slices against the grain.
  5. Serve with the Avocado Grilled Tomato Salsa and enjoy!

Final Product Photo:

img_3311.jpg

The original recipe encourages you to serve with extra cilantro and lime wedges, but we’re just not that fancy – hah!